Friday, May 30, 2014

Best Sunless Tanners

I love a good tan. Having some color can do so many things: makes your teeth whiter, you look thinner, your muscles are more defined, your skin has a healthy glow etc.  Going to a tanning bed is expensive, time consuming and not the best choice for your health. But living in Oregon means that I won't be seeing the sun for months on end so I had to figure something out.

I personally love a good, airbrush tan. It looks the most natural and is guaranteed even coverage. This is also expensive so it is a treat for me but not something I can do very often.

Out of all the self tanners I have tried, these are the ones I like best and why:

I love this one for your face and neck. I don't attempt to spray my body because it's too hard to get it even.
 Pros: It provides a quick, smooth, even coverage
 Cons: It can be clumpy/spotty


I love this L'Oreal sunless tanner for body coverage.
Pros:  It gives great color and dries super fast. It has some bronzer and sparkle in it so you can see where you have applied it. It does not streak and gives natural looking color. It washes off your hands easily and does not leave them looking discolored.  It's not expensive!  It's around $6 I think?
Cons: I don't prefer the sparkle in it so I like to apply it at night so that I can shower it off in the morning.  It feels a little sticky because it's a gel but overall it does dry very nicely. This one could be more "orange" on some people but you'd have to try it to see.


I actually have not tried Tanwise yet but I have it on my to do list! It has great reviews and comes with a mitt that you can wear to avoid getting it on your hands. It's a mousse so would dry quickly!


I have told you all about Sunlabs Sunless tanner before and I do love it because it is the least "orange-y" colored one I have used, however, the cons outweigh the pros for me.
Pros:  Gives a dark tan that is not orange, no parabens and no super bad smell. 
Cons:  VERY hard to get off your hands as it sinks in to your palms while you apply it.  This lotion takes a lot of it to get a noticeable tan so you have to really slather it on. 

TIP:  If you are having trouble washing it off your hands after application, use baking soda on your palms and scrub them together then rinse.


XOXO
Joy


Monday, May 26, 2014

Bronzy Summer Makeup Tutorial

Ok ladies, here is a fun tutorial featuring a special summer look.  Bright lips and glowing skin spell summer to a tee. Luckily you can achieve this look even if you don't have a tan. With the change of the seasons, you don't have to change up all your products, but you should use them differently. Just tweaking a few things can give you a whole different look. Blending some bronzer with your blush, for example, can give you more of a summer looking flush.


Foundation: Estée Lauder Doublewear Foundation
Contour: Bahama Mama Bronzer
Bronzer: MAC Mineralize Give Me Sun
Blush: MAC Rose
Lip Liner: Estée Lauder 04 Rose
Lipstick: Estée Lauder Infamous

Monday, May 19, 2014

How to: Summertime Smooth Legs

My sister-in-law told me about this tip that she had read about to get silky smooth legs but I was hesitant to try it.  It sounded like a lot of work and I have a busy toddler so I'm always looking for ways to cut time off of my beauty routine, not add to it.

The recipe for super soft legs went something like this:  a DIY sugar scrub (here is a list of recipes to try) that you slather all over your body in the shower, shave it off and do it all over again.  My first reaction was probably the same as yours:  Shave twice??  Who has time to shave twice?  I barely have time to shave once!

I thought about it, though and decided to try it once - well, at least the shaving twice part.  I tried it on a day where I didn't have to wash my hair, just needed to rinse off (please tell me I'm not the only one who splits shaving and hair washing into different days to save time? =)).

I am not a big fan of sugar scrubs.  I hate the residue they leave all over the shower or tub (again, makes cleaning take longer and I'm all about saving time!).  I actually have a pair of these guys in my shower:


Peter and I both use them to wash off and we love them!  It's super fast but has more exfoliating power than a regular wash cloth.  They are washable so I throw them into the washer every so often to clean them and just keep using them.

So, I exfoliated really well using these gloves and my trusty Dove soap, shaved and did it all over again.

I will say that there was a difference - it was the closest shave I have ever had and my legs were super smooth.  Is it something I can't live without and will have to do from here on out?  No.  BUT, it was the perfect prep for my DIY sunless Tan so I highly recommend it for that (blog coming on DIY tan!).

Give it a try and let me know what you think!

XOXO
Joy

Friday, May 16, 2014

Beauty Tip: Give Your Hair a Break

Want long lasting curls?  Healthier hair?  More bounce and shine overall?  Here is the best tip I have to offer you:

Don't blow dry your hair.  I know, I know, I hate letting my hair air dry.....it takes a while, does not look as good, has less volume and really looks a lot shorter than when I blow dry it.  BUT, air-dried hair does not have all the fly-aways, is a lot more soft and smooth (not just in appearance) and holds curl like nothing else.  I am convinced it is the secret to 1920's curls.  Plus, your hair needs a break!  Blow drying your hair is the most damaging for it (more so than curling it) and if you never give it a break, it will produce more split ends, breakage etc.

Right now I am in the process of going from brunette back to blonde and my hair is fragile so I have to do all that I can to help it maintain its health.  I have sworn to not blow dry it at all while my hair is still in the lightening process in an effort to help it along.  And you know what?  It actually hasn't been that bad!  If I curl it a little once it is fully dried (with a heat protecting spray) it looks really beautiful, soft and the curls hold for a couple days.


 I do miss the length.  It looks noticeably shorter when it air dries but it is totally worth it at this point.

I wanted to do a picture of it when I blow dry it versus air dry but since I am not blow drying it right now, you will have to take my word for it.  With the fragile state that my hair is in, it looks REALLY corn-stalky when I dry it.  I mean, it looks bad and then I have to curl it just to make it look okay (which means double the heat exposure).  Air drying produces much softer looking hair and really amazing curls.

We all need a break every so often, our hair is no exception.  =)


XOXO
Joy

Monday, May 12, 2014

Daily Outer Appearance: Why even bother?

When I talk hair/makeup/outfits with others, a lot of times I kind of get the blank look.  You know the look I'm talking about.  It's a look that makes you feel like you are from another planet or something and it for sure let's you know that they are shutting down fast so you better change the topic.


It is common to hear:
"Wow, you look nice today, what's the special occasion?"

"But what's the point?  I'm just home with my kids so why am I gonna do my makeup and dress up?"

 "I just don't have time for that."

"I'll wait until the kids are older."

Now, am I saying that we can't have days where we stay in our sweats and ponytails all day?  Emphatically, NO!  Please hear me in this.  We all need a break every now and then - I, of all people, get that.  AND, I have days where I put back on my clean pajamas after my workout/shower.   How's that for irony?  =)

What I am saying is that this isn't the "norm" for me and I will tell you why.  Growing up, I was homeschooled with my brothers and sisters so the common question I got was "Wow, you get to do school at home - does that mean you get to stay in your pajamas?"  When I first heard that question, I thought it was silly because the thought had never entered my head.  Why would I stay in my pajamas all day?  You only do that if you are sick...The reason I had not thought of it was because my mother taught us from the beginning that we always got dressed in the morning.  We had a routine of getting up, brushing our teeth, washing our face, brushing our hair (and for the girls, we did our hair in some sort of style usually complete with a bow), getting dressed and then going about our chores.

My own mother, who was raising 9 children, homeschooling all of them, making all our food from scratch and heavily involved in church, did her hair/makeup and clothes every day.  I never have seen my mother wear pajamas during the day.  I have never seen her not do her hair in some way.  I have seen her occasionally go without makeup or do very little of it.  She took care of herself everyday and taught us to do the same.  This was because she knew a secret:  when you put effort into your appearance, you feel better about yourself and it will affect your entire day and who you are.  When you feel better about yourself, your confidence goes up, your attitude changes and you feel much more prepared to take on the challenges that a day presents.

My beautiful Mother with my Dad, Simon and his cousin


You have to dress for success - even as a Mom!  I would say, ESPECIALLY as a Mom.  We have little people who's attitudes and days are hugely affected by ours and they are watching us as an example.  You are showing them that you are worth putting some effort into and therefore, they will know they are worth putting effort into themselves.

This is also a small way to show your husband that you are still a wife to him who cares about her looks for her husband.  This is your love story and you want to put in effort when and where you can!  Your story doesn't end after the wedding - it only just begins!  One of my favorite memories of my mother is triggered by the smell of lipstick.  I love that smell because when I was a child, she would kiss me goodbye (usually to go on a date with my Dad) and I could always smell the lipstick that she had freshly applied.  She made sure to put in extra effort for date night and, without ever saying a word, was an example in that to me and has affected me more than I realized.

If you don't believe me that it will affect you or make a difference, I challenge you to put it to the test:


The Effort Test:
For one week, do your hair, apply some makeup (you can just wash your face and use mascara or something if you don't want to do a lot) and put on clothes (that aren't sweats or workout clothes).  THEN, after the week is up, allow yourself to have a week of sweats and no effort with hair and makeup.  Compare the two weeks and see if there are any obvious affects.  Then please write me and tell me what you think!  I would love to hear your story.  Tag me in your photos on FB and use hashtag #theefforttest. This will be a lot of fun!  =)


Have a great day!  

XOXO
Joy


Tuesday, May 6, 2014

Mixing Accessories

Accessories can be so much fun - especially right now with all the fun and funky trends!  From big, statement pieces to all the cool rings, bangles and earrings, there are a lot of options out there.  One thing that can be confusing is how to properly mix them when they don't all "match".  This is something that I have been experimenting with lately and I think I am discovering some secrets to it.

I have heard one, general rule to accessorizing:  Before you leave the house, take one thing off.  Now, if you don't tend to wear too many accessories this probably doesn't apply to you.  If you love jewelry and things like I do, you probably should pay attention.  Are you wearing earrings, a ring, bangles and a necklace?  It's probably a tad too much.  Too much looks way overdone and has the opposite effect that you are trying to achieve.  You want your jewelry to add a statement without being obnoxious.


This is an example of a more casual outfit so I didn't do a ton of accessories.  I am using a belt, earrings and bracelet to accent this outfit.
 I love this turquoise wrap bracelet - it goes with absolutely everything!  I use it as my "pop of color" all the time.  The earrings go nicely with my white top - they have white, light pink and gold on them.  Because they pair so well with my top and almost "match", the turquoise can be my pop of color and still go well with my outfit even though it doesn't match my earrings.  If you have earrings that are a bright color and then another piece that is a bright color, it can be too much or clash.  Try to have one piece be more neutral and they other more of a statement (unless they are a set).

Easter Sunday 2014

This is one last example - not the best picture for it but you can still see the accessories.  With this coral dress, I paired coral earrings, a gold ring with coral and a bright red necklace.  This works because most of the jewelry matches the dress with one piece as the statement by being the pop of color.  If all the jewelry was red, that would work too, but I think it's more fun to mix it up.  =)


Saturday, May 3, 2014

Grilled, Stuffed Portabello Mushroom Burgers

"Peter," I said excitedly, "I got portabello mushrooms at Costco today and I'm going to make burgers for dinner!" (Visions of being a good-vegetarian-supportive-wife going through my head.)

 "Huh."  Was the response I heard back.

  I blinked, did he not hear me?  He must be tired or something.  I am making you a nice, vegetarian meal!, I wanted to shout at him.

  For those of you who don't know our history, Peter was raised strictly vegan and did not consume any meat until he was in his early 20's.  I, on the other hand, have officially been dubbed "The Apostle of Hunting" (by his family) as I was raised in a hunting family.  As you can imagine, becoming one in our eating habits has had it's own special dance in our marriage.  We are learning to lovingly, respectfully value the other's opinions and come to our own compromise in what works for our family.  We are half and half at this point.  Some times I make meat, some times I don't, other times I make a meal with meat and plenty of other options so that everyone is happy.  But I always know the way to Peter's heart is to make him a delicious, home-cooked, vegetarian meal.

Fortunately, this is not hard for me because he is a true vegetarian - he loves, loves, loves veggies.  He would be perfectly happy with a meal full of different kinds of fresh veggies and maybe some whole wheat pasta or brown rice etc.  I love being married to a man who so enjoys his greens - it helps me to eat a lot healthier as well.

  But back to the burgers.  Grilled, stuffed, portabello mushroom burgers to be exact.  These guys were every bit as exciting as they sound.


    To get started, I marinated the mushrooms in olive oil, fresh garlic, sea salt and cracked pepper.


  I just put the tops in a ziplock and let them marinate for about 2 hours.  I decided to make my own stuffing as all the recipes I found had meat in them (trust me, it sounded delicious but, you know, I was going for the vegetarian thing).  So I took what veggies I had in my fridge that sounded good and decided on a mixture.

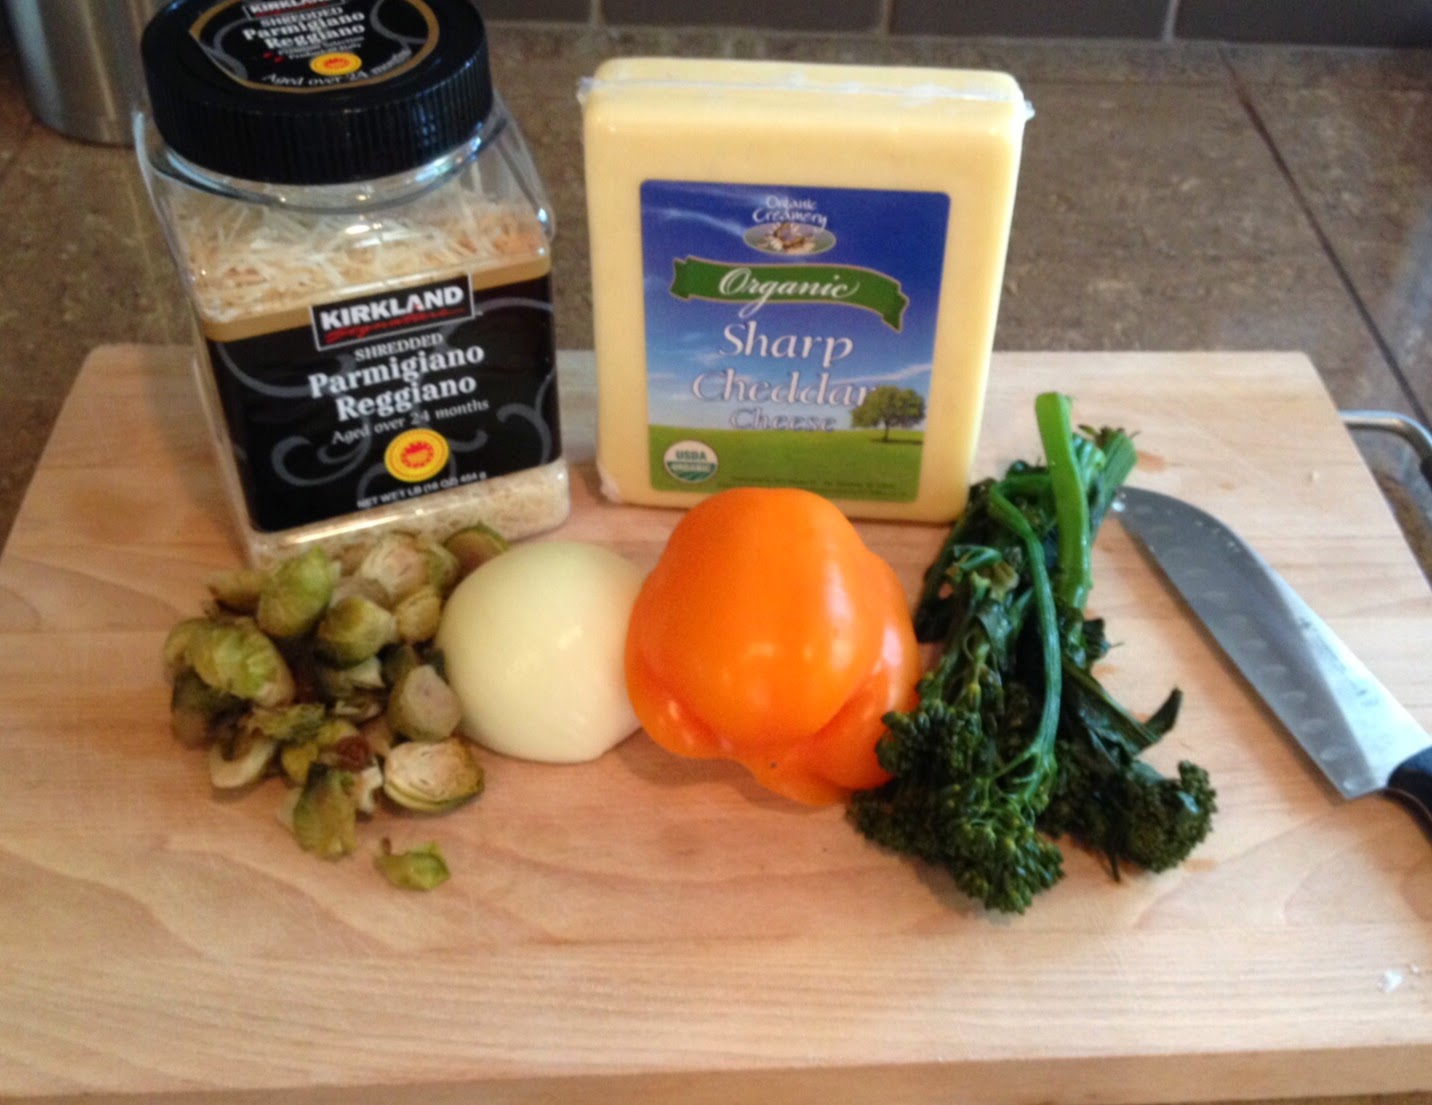
Roasted brussel sprouts, onion, pepper steamed broccoli, Parmesan and sharp cheddar cheese

I sauteed the onion and pepper first, then added in the brussel sprouts, broccoli and cheese and turned off the heat.


I decided to throw in some roasted pine nuts as  well to add a little crunch to the mixture.


I grilled the mushrooms stem side down (with the stem removed) for about 3-4 minutes then flipped them and grilled the soft side for about 2 minutes before stuffing them and returning them to the grill.

We were out of ketchup so I decided to attempt a homemade greek yogurt, dill, cucumber dip. The recipe said to brine the cucumber with salt to remove excess water but I obviously didn't have time for that so I skipped that part.

I peeled and grated about a half of a big cucumber, added a little salt, about a cup of greek yogurt with a touch of sour cream (used up what little I had).  Then added one-half of a fresh lemon, fresh cracked pepper and a little more salt to taste.


These were amazing and definitely a new summer favorite!  Simon ate the filling as he loves pine nuts.  The nuts added a nice crunch and the melted cheese held everything together nicely.  I loved eating them stuffed as opposed to by themselves as a burger - they seemed a lot more filling this way.  I didn't even use a bun - just ate it like this with some fresh spinach.  Peter used a really thin bun for his and they held together great.  The greek yogurt, dill, cucumber dip was so fresh and light - the perfect topping for these.  I will be making it all summer just to eat as a dip with veggies.  

They look like a lot of work but really, they were super easy (especially considering that some of my veggies were already cooked and left-over from a previous meal).  

TIP:  It's hard to know when the mushrooms are "done" cooking (it was my first time with these) but they are a true mushroom and will release a bunch of water when they are really cooking.  Watch for that and they're just about done.  


Enjoy!  

XOXO
Joy